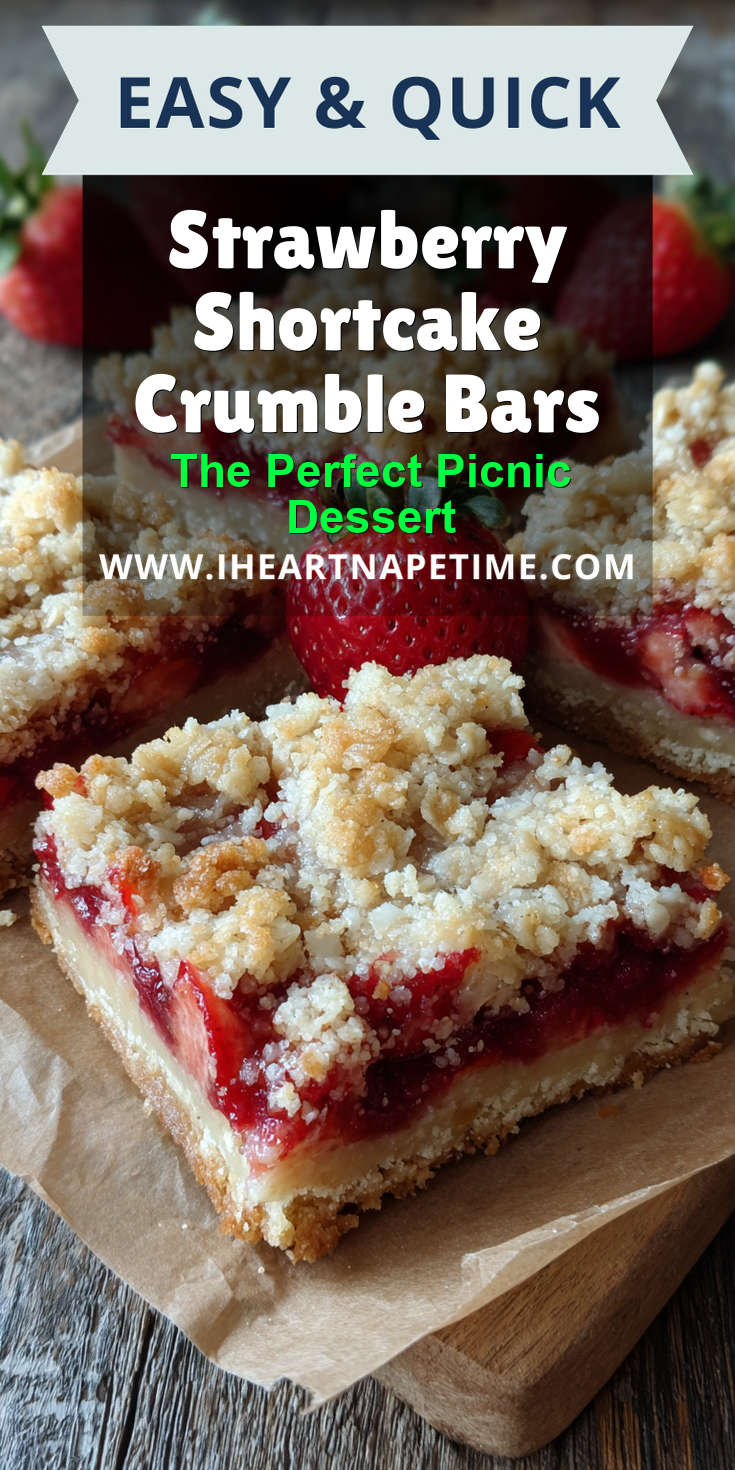
Some recipes just feel like a warm hug. For me, these Strawberry Shortcake Crumble Bars are one of them. They have that perfect mix of sweet, juicy fruit and a buttery, crumbly oat topping. If you love the flavors of strawberry shortcake, you might also enjoy this Fluffy Strawberry Shortcake Puppy Chow for another fun, shareable treat.
It’s a dessert that takes me right back to my grandma’s kitchen. The smell of baking oats and bubbling strawberries is pure comfort. I think you’ll find it brings back happy memories for you, too.

This dish is a wonderful twist on a classic summer dessert. It captures all the flavors of a traditional strawberry shortcake in a simple, handheld bar. It’s perfect for sharing at a picnic or as a sweet treat after dinner.
Recipe Overview
- Cuisine: American
- Category: Dessert
- Prep Time: 20 minutes
- Cook Time: 45 minutes
- Total Time: 1 hour 5 minutes
- Servings: 16 bars
The Story Behind This Classic Recipe
This recipe is my own love letter to two timeless favorites. I’ve always adored the simple joy of a strawberry shortcake. I also love the homey feel of a good fruit crumble.
One day, I wanted to combine them into something easy to share. The result was these crumble bars. They have the soul of a rustic, farmhouse dessert.
They remind me of long summer afternoons and family gatherings. The kind where dessert is the main event. I hope they become a part of your own family’s story.
What Makes This the *Traditional* Way
The traditional way is all about honest ingredients. We’re not using fancy pastry or complicated techniques here. This is about letting the fruit shine.
We use a simple, buttery shortbread base and topping. It’s made with oats for that signature crumble texture. The filling is just sweetened strawberries, thickened gently.
There are no strange gels or extracts. The flavor comes from ripe fruit and a little vanilla. It’s the way desserts were meant to be—simple and satisfying.
The Classic Ingredients (No Fancy Stuff!)
Gathering these ingredients is half the fun. You likely have most of them in your pantry already. Let’s keep it simple and classic.
Strawberry Shortcake Crumble Bars Recipe
The Classic Ingredients (No Fancy Stuff!)
How to Make It Just Like Grandma Did
Notes
Enjoy your homemade Strawberry Shortcake Crumble Bars Recipe!
- For the Crumble Base & Topping:
- 2 cups all-purpose flour
- 2 cups old-fashioned rolled oats
- 1 1/2 cups packed light brown sugar
- 1/2 teaspoon baking soda
- 1/2 teaspoon salt
- 1 cup (2 sticks) cold unsalted butter, cubed
- For the Strawberry Filling:
- 2 lbs fresh strawberries, hulled and sliced
- 1/2 cup granulated sugar
- 1/4 cup cornstarch
- Juice of half a lemon (about 1 tablespoon)
- 1 teaspoon pure vanilla extract
How to Make It Just Like Grandma Did
Don’t let the layers fool you. This recipe is wonderfully straightforward. Just follow these steps for a perfect pan of comfort.
- First, heat your oven to 350°F (175°C). Grease a 9×13 inch baking pan and line it with parchment paper. This makes lifting out the bars so easy later.
- Make the crumble. In a large bowl, mix the flour, oats, brown sugar, baking soda, and salt. Add the cold, cubed butter. Use a pastry cutter or your fingers to work the butter in until the mixture looks like coarse crumbs.
- Set aside about 2 cups of this crumble mixture for the topping. Press the rest firmly and evenly into the bottom of your prepared pan. Bake this base for 15 minutes.
- While the base bakes, make the filling. In a medium saucepan, combine the sliced strawberries, sugar, cornstarch, and lemon juice. Cook over medium heat, stirring often, until the berries break down and the mixture thickens. This takes about 8-10 minutes. Remove from heat and stir in the vanilla.
If you’re looking for another way to use up fresh strawberries that’s perfect for little hands, try these easy strawberry yogurt bites.
- Once the base is done, spread the warm strawberry filling evenly over it. Sprinkle the reserved crumble topping over the filling.
- Bake for another 30-35 minutes, until the topping is golden brown and the filling is bubbly. Let the pan cool completely on a wire rack before cutting into bars. This patience is key for clean slices!
My Tips for Perfecting This Classic
A few little tricks can make a big difference. They help you get that perfect texture and flavor every single time.
First, use cold butter. This is the secret to a flaky, crumbly topping. If the butter is soft, the topping can become dense.
Second, let the bars cool fully. I know it’s hard to wait! But if you cut them while warm, the filling will run. Letting them set makes for neat, perfect bars.
How to Store and Enjoy Later
These bars are fantastic for making ahead. They store beautifully, which makes them ideal for picnics or lunchboxes.
Once cooled, store them in an airtight container at room temperature for 2 days. For longer storage, keep them in the fridge for up to 5 days. You can also freeze them for up to 3 months.
I love them slightly warmed, with a little scoop of vanilla ice cream. But they are just as delicious at room temperature with a cup of tea.
Nutrition Notes
- This is a dessert, meant to be enjoyed in moderation. Each bar is a satisfying sweet treat.
- Using whole oats adds fiber. The strawberries provide a dose of vitamin C.
- For a slight boost, you can swap half the all-purpose flour for whole wheat flour. The flavor will be nuttier and just as good.
Your Questions About This Classic Recipe
Here are answers to a couple of common questions I get about this recipe. They might help you, too.
Can I use frozen strawberries?
Yes, you can! There’s no need to thaw them first. Just add the frozen berries directly to the saucepan. You may need to add a minute or two to the cooking time for the filling to thicken properly.
Can I make these bars gluten-free?
Absolutely. Use a good 1-to-1 gluten-free all-purpose flour blend in place of the regular flour. Make sure your oats are certified gluten-free. The method stays exactly the same.
My filling is too runny. What happened?
This usually means it needed to cook a bit longer. The cornstarch needs to come to a simmer to activate its thickening power. Next time, let the strawberry mixture bubble gently for a full minute after it thickens before taking it off the heat.
I truly believe some recipes are meant to be shared. This one, with its humble ingredients and big heart, is one of them. It’s a little piece of food history you can hold in your hand. For another decadent strawberry dessert, you must try this rich Strawberry Chocolate Cake.
I hope baking this classic brings as much warmth to your kitchen as it does to mine. It’s a sweet reminder of simpler times and the joy of a homemade dessert.
If you make it, I would love to hear about it. Did it remind you of a dessert from your childhood? Please let me know your thoughts and memories in the comments below. And if you loved it, a star rating would mean the world to me!