I published this recipe for Pineapple Dream Delight Dessert a few years ago after a total kitchen disaster. I was trying to make a fancy layered cake for a summer potluck, and let’s just say the Florida humidity had other plans. My layers slumped into a delicious, but very sad, puddle. I needed a miracle, and fast. That’s when I remembered the magic of no-bake treats like these Chunky Monkey Banana Bites.
I scraped my cake layers into a pan, mixed in some crushed pineapple and Cool Whip, and threw it in the fridge. What came out a few hours later was a revelation. It was even better than my original plan! Creamy, dreamy, and bursting with tropical flavor.
This dessert saved the day, and it’s been a staple in my home ever since. It’s the ultimate no-fuss, no-bake hero.
Recipe Overview
- Cuisine: American
- Category: Dessert
- Prep Time: 20 minutes
- Cook Time: 0 minutes
- Total Time: 4 hours 20 minutes (includes chilling)
- Servings: 12 bars
Why This Recipe is So Special
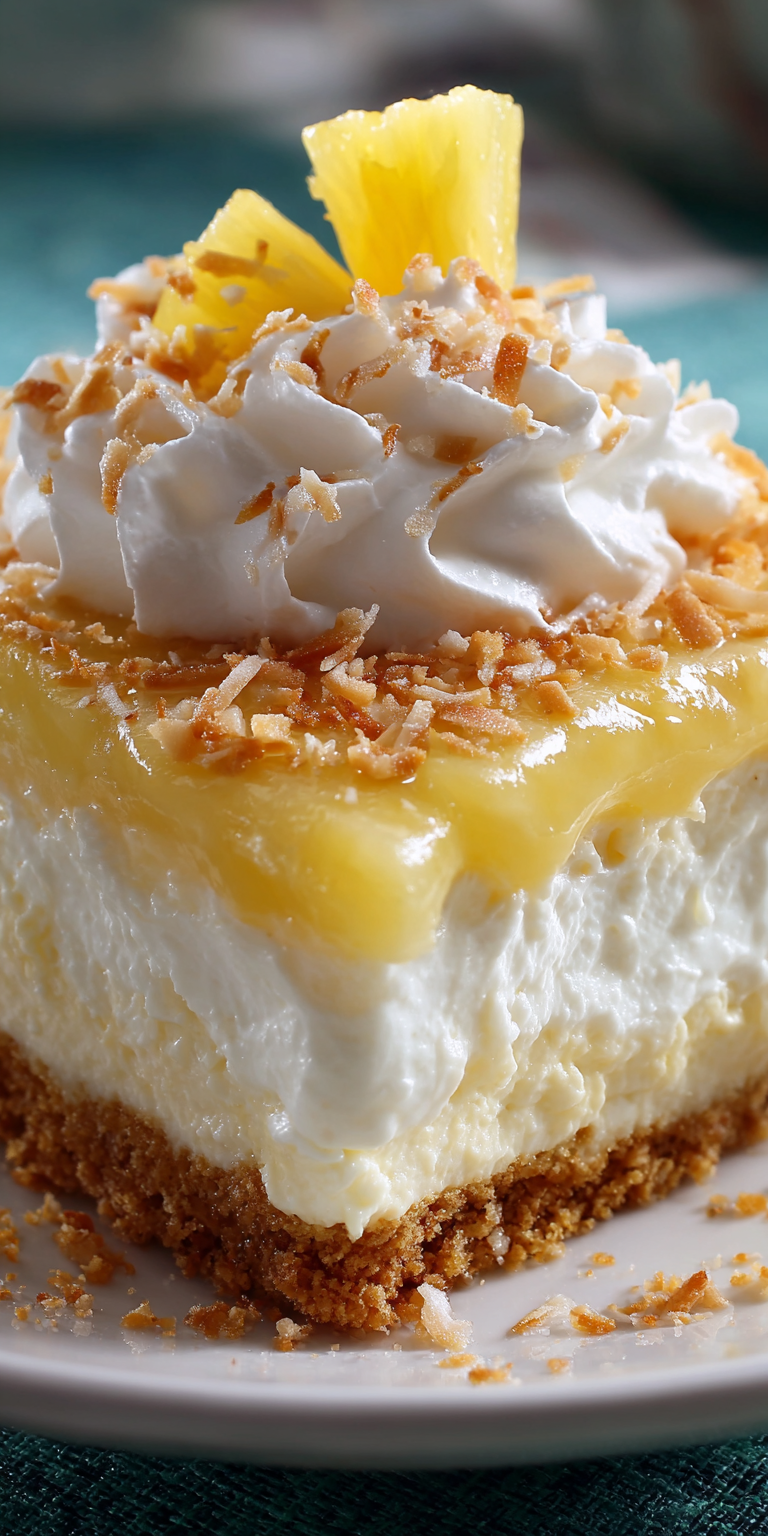
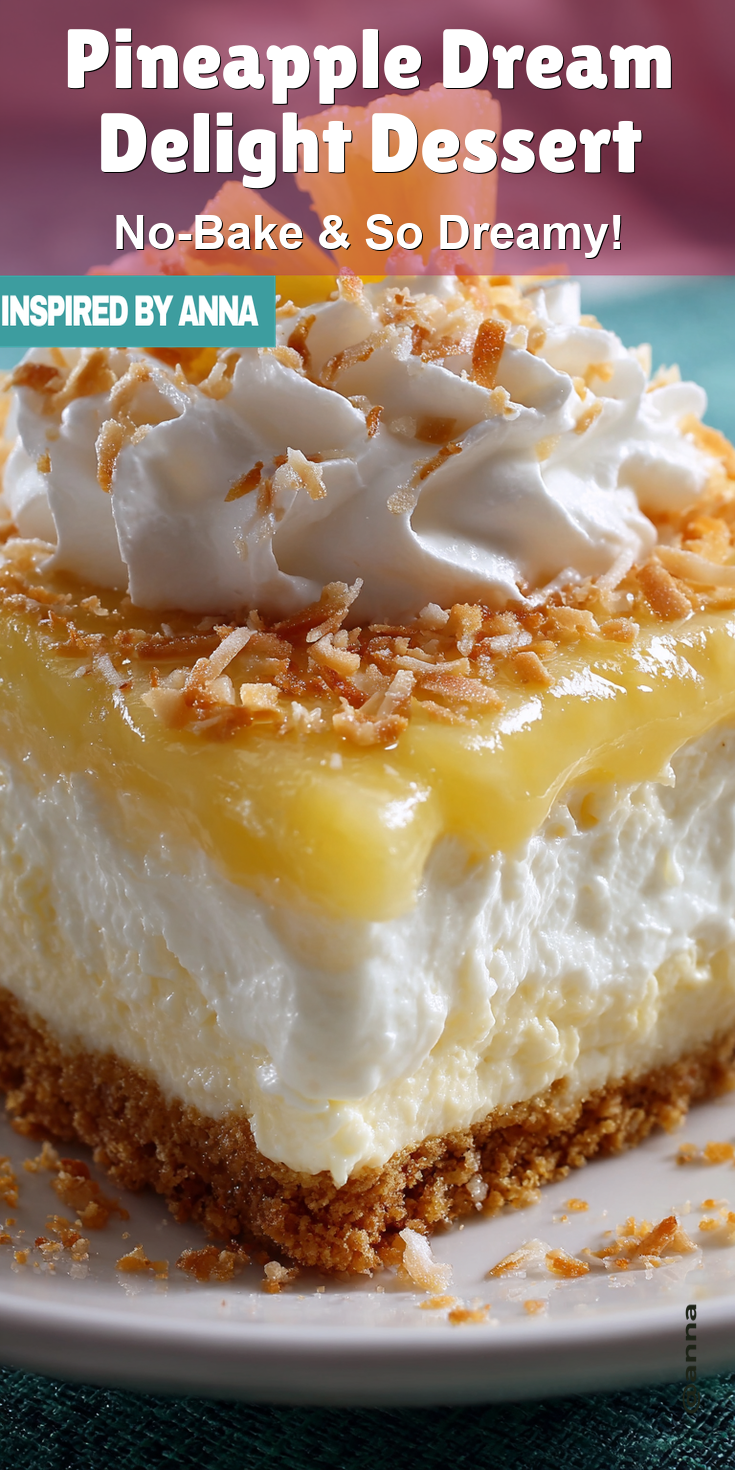
What makes this dessert so special is its beautiful layers and incredible texture. It’s like a tropical vacation in a pan.
You get a buttery, crunchy graham cracker crust. Then a sweet and creamy cheese layer. Finally, a fluffy, pineapple-packed topping that’s just pure sunshine.
The technique is simple, but the result looks like you spent all day in the kitchen. It’s the kind of dessert that makes people ask for the recipe every single time.
The Full Ingredient List
Gathering your ingredients is the first step to this tropical dream. I like to have everything measured and ready to go before I start. It makes the process so smooth.
- 2 cups graham cracker crumbs
- 1/2 cup unsalted butter, melted
- 1/4 cup granulated sugar
- 1 (8 oz) package cream cheese, softened
- 1 cup powdered sugar
- 1 (8 oz) tub Cool Whip, thawed, divided
- 1 (20 oz) can crushed pineapple, VERY well drained
- 1 (3.4 oz) package instant vanilla pudding mix
- 1 cup cold milk
My Step-by-Step Method
Here’s my exact process. Follow these steps, and you really can’t go wrong. I love how everything comes together so easily.
- First, make the crust. In a medium bowl, mix the graham cracker crumbs, melted butter, and granulated sugar until it looks like wet sand.
- Press this mixture firmly and evenly into the bottom of a 9×13 inch baking dish. I use the bottom of a measuring cup to get it nice and tight. Pop it in the fridge to set while you make the next layer.
- For the creamy layer, beat the softened cream cheese and powdered sugar in a large bowl until it’s completely smooth. This is key for a silky texture.
- Gently fold in half of the thawed Cool Whip (about 4 oz) into the cream cheese mixture until no white streaks remain.
- Spread this creamy layer evenly over your chilled crust. Smooth it out with a spatula. Then, place the whole dish back in the refrigerator.
- Now, for the dreamy pineapple top! In a clean bowl, whisk the instant pudding mix with the cold milk for 2 minutes. It will start to thicken right away.
- Immediately fold in the very well-drained crushed pineapple. Getting as much liquid out as possible is the most important tip for this step.
- Finally, gently fold in the remaining half of the Cool Whip until everything is combined and fluffy.
- Spread this pineapple mixture over the cream cheese layer. Cover the dish and chill for at least 4 hours, or overnight for the best flavor.
- When ready to serve, slice into bars. For clean cuts, you can run your knife under hot water and wipe it dry between slices.
My Top Tips for Success
- Drain that pineapple! I can’t say it enough. I press mine in a fine-mesh strainer, then squeeze it in a clean kitchen towel or paper towels. A watery pineapple will make your top layer runny.
- Make sure your cream cheese is truly softened. Leave it on the counter for an hour. This prevents lumps and makes blending with the sugar so much easier.
- Use cold milk for the pudding. It helps it set up properly and gives that perfect pudding texture.
- Let the dessert chill the full time, or even overnight. This allows all the layers to firm up and the flavors to really come together.
Common Mistakes to Avoid
I’ve made a few of these myself over the years! Avoiding these simple pitfalls will guarantee a perfect dessert.
First, not draining the pineapple enough. This is the number one reason for a soupy top layer. Take the extra minute to really get the juice out.
Pineapple Dream Delight Dessert Recipe
The Full Ingredient List
My Step-by-Step Method
Notes
Enjoy your homemade Pineapple Dream Delight Dessert Recipe!
Second, using cold cream cheese. If your cream cheese is cold, you’ll have tiny lumps in your middle layer. No one wants that. Soften it first for a beautifully smooth result.
Third, skipping the initial chill for the crust. If you spread the creamy layer on a warm crust, it can make the crust soggy. A quick 15-minute fridge rest makes it sturdy.
NUTRITION INFORMATION
- Calories: ~320 kcal
- Carbohydrates: 38g
- Protein: 3g
- Fat: 18g
- Saturated Fat: 11g
- Cholesterol: 45mg
- Sodium: 220mg
- Sugar: 28g
*Please note: This is an estimate per serving. Actual values can vary based on specific ingredient brands used.
FREQUENTLY ASKED QUESTIONS
Can I use fresh pineapple instead of canned?
I don’t recommend it for this recipe. Fresh pineapple contains an enzyme that breaks down dairy and can prevent your layers from setting properly. Canned pineapple is cooked, which deactivates that enzyme, making it perfect for this no-bake treat.
Can I make this dessert ahead of time?
Absolutely! In fact, I think it tastes even better the next day. You can make it up to 24 hours in advance. Just keep it covered tightly in the refrigerator until you’re ready to serve.
What can I use instead of Cool Whip?
For a similar texture, you can use an equal amount of homemade sweetened whipped cream that has been whipped to stiff peaks. Just know that the dessert might be a bit softer. The stabilized pudding mix still helps a lot with the structure.
Leave a Reply! (I’d Love to Hear From You!)
Did you make this tropical dream come true in your own kitchen? I would be thrilled to hear how it turned out for you! Tell me all about it in the comments below. Did your family love it? Did you add your own twist? Whether you’re a fan of sweet snacks like Mini Doughnut Hot Buttered Cheerios or prefer lighter, savory dishes like this Low-Carb Zoodle Shrimp Scampi, your stories and questions are my favorite part of sharing recipes. Happy baking—or should I say, happy no-baking!