I love a delicious meal as much as the next person. But you know what I don’t love? The mountain of dirty pots, pans, and utensils left behind. It’s enough to make you order takeout every night. That’s why I’m a huge fan of one-pan meals like this sweet Honey BBQ Chicken & Rice for dinner, and one-bowl wonders for dessert.
What if I told you there’s a way to have your cake and eat it too? Or, more accurately, to have your Bunny Button Cookies Magic and only wash one bowl? That’s the dream, right? A treat so good it feels like a slice of Heaven on Earth Cake, but with the cleanup of an easy dessert.
We’re all about maximum flavor with minimum fuss here. So let’s dig into a recipe that’s a true quick dessert hero. It’s sweet, simple, and will leave your sink blissfully empty.
Recipe Overview
This is the kind of recipe you turn to when a sweet craving hits and you have zero patience for a big mess. It’s pure, simple cookie magic.
- Cuisine: American
- Category: Dessert
- Prep Time: 10 minutes
- Cook Time: 10 minutes
- Total Time: 20 minutes
- Servings: About 2 dozen cookies
The Magic of a One-Pot (or One-Bowl) Recipe
For me, the magic isn’t just in the taste. It’s in the process. Or, more specifically, the lack of a chaotic process. This principle works for savory dinners too, like a luxurious Creamy Shrimp Scampi Orzo.
One-bowl baking means you mix everything in a single vessel. No creaming butter and sugar in one bowl, mixing dry ingredients in another, and dirtying a third for chocolate chips. You just add, mix, and scoop. It’s the ultimate efficiency hack for bakers who hate cleanup.
All You Need (One Bowl & These Ingredients)
Gather your tools first. This keeps you organized and prevents mid-recipe scrambling. You’ll thank yourself later.
You need just one large mixing bowl, a sturdy spoon or spatula, a baking sheet, and parchment paper. That’s it. No mixer, no special gadgets. Now, let’s talk about what goes in that bowl.
The Full Ingredient List
- 1 cup (2 sticks) unsalted butter, softened
- 3/4 cup granulated sugar
- 3/4 cup packed light brown sugar
- 2 large eggs
- 1 teaspoon vanilla extract
- 2 1/4 cups all-purpose flour
- 1 teaspoon baking soda
- 1/2 teaspoon salt
- 2 cups semi-sweet chocolate chips
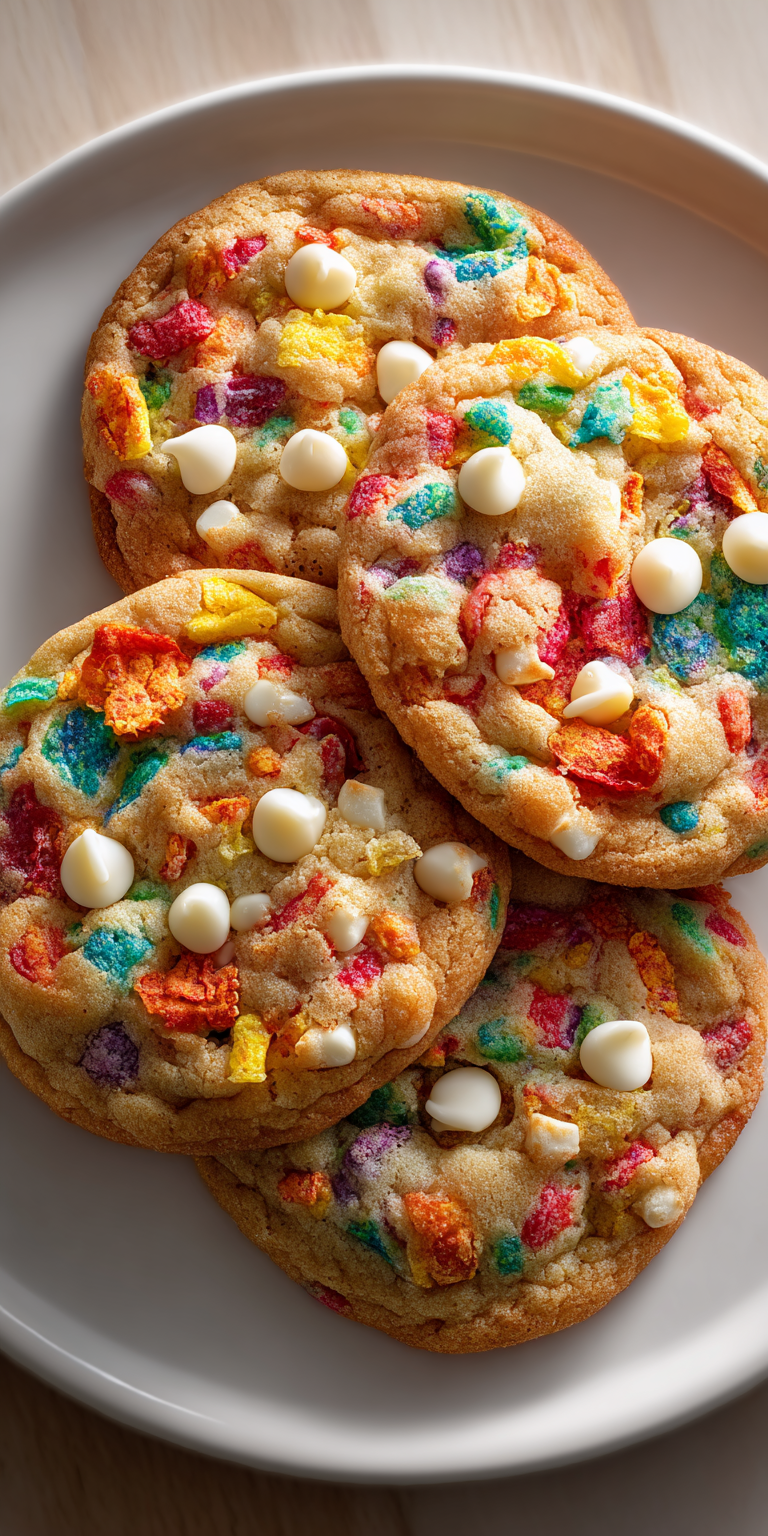
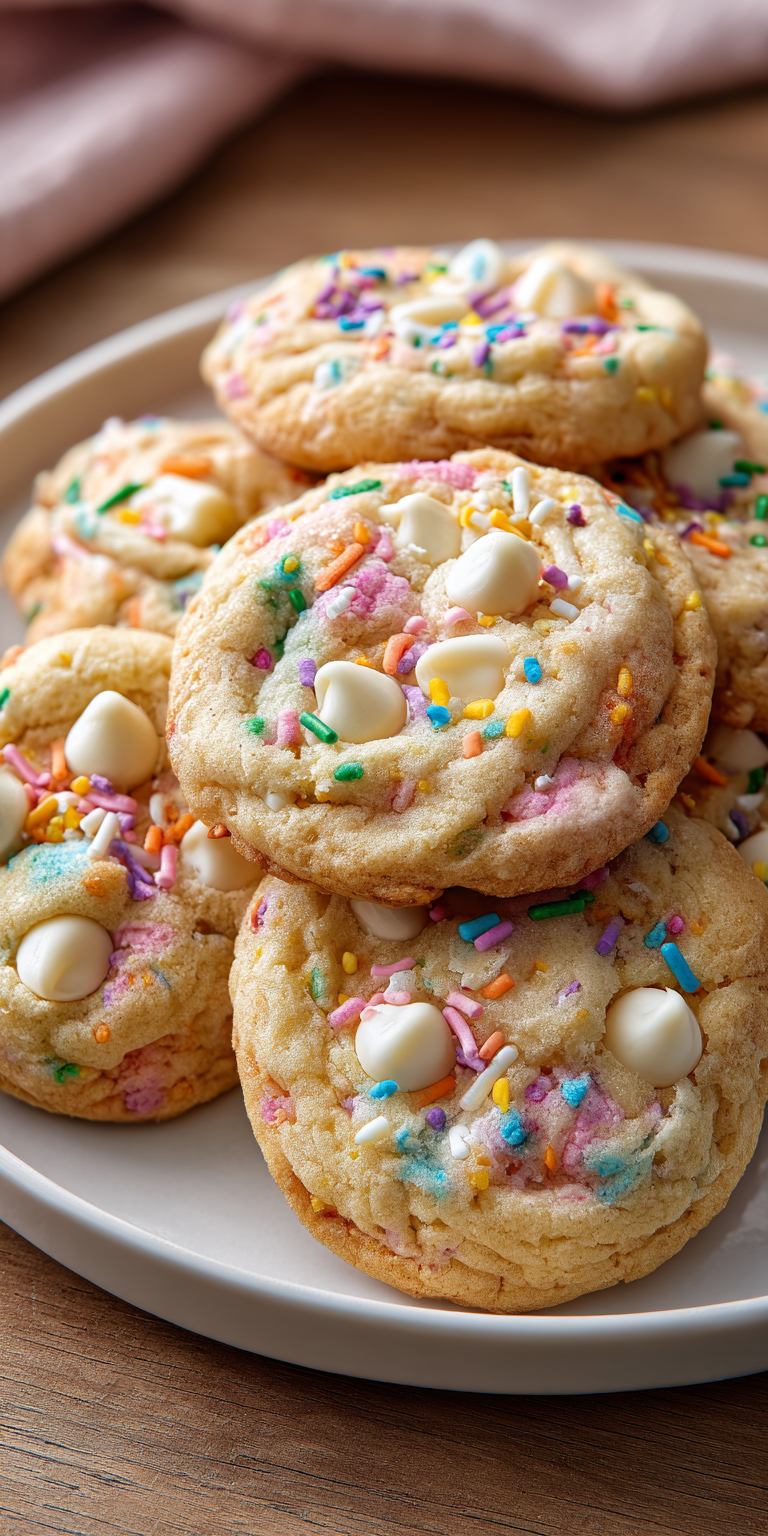
- 1 cup pastel-colored M&M’s or similar candy-coated chocolates
My “Less Mess” Cooking Method (Step-by-Step)
Follow these steps in order, and you’ll keep the mess contained to that one beautiful bowl. I promise it’s simple.
Bunny Button Cookies Magic Recipe
The Full Ingredient List
My “Less Mess” Cooking Method (Step-by-Step)
Notes
Enjoy your homemade Bunny Button Cookies Magic Recipe!
- Heat your oven to 375°F (190°C). Line your baking sheet with parchment paper. This is a non-negotiable step for easy cleanup and no sticking.
- In your large bowl, combine the softened butter, granulated sugar, and brown sugar. Mix them together until they’re well blended and creamy.
- Add the eggs and vanilla extract to the butter mixture. Stir until everything is smooth and fully combined.
- Now, add the flour, baking soda, and salt right on top of the wet ingredients. Gently stir it all together. Mix just until you no longer see dry flour. Overmixing is the enemy of tender cookies!
- Finally, fold in the chocolate chips and the pastel candies. This is where the “button” magic happens!
- Drop rounded tablespoons of dough onto your prepared baking sheet, about 2 inches apart. You can gently press a few extra candies on top for a pretty look.
- Bake for 9-11 minutes, or until the edges are just turning a light golden brown. The centers will look soft—that’s perfect. Let them cool on the sheet for 5 minutes before moving them.
Pro-Tips for Perfect One-Bowl Baking
A few small tricks make a huge difference in your results and your cleanup time. These are my go-to rules.
First, use the right size bowl. Too small, and you’ll have flour flying everywhere. Too big is fine, but a standard large mixing bowl is ideal. Second, have your parchment paper and baking sheet ready before you start mixing. Third, a rubber spatula is your best friend for scraping the bowl completely clean.
Storing & Reheating (Easy!)
These cookies store beautifully, which means you can make them ahead. It’s a great trick for last-minute guests or a sweet treat all week.
Let the cookies cool completely. Then, store them in an airtight container at room temperature for up to 5 days. For a warm, fresh-from-the-oven feel, pop a cookie in the microwave for 10-15 seconds. It’s like magic all over again.
Nutrition Notes
Let’s be real—these are a treat! But it’s always good to know what you’re enjoying. This is a rough estimate per cookie.
- Calories: ~180
- Total Fat: 9g
- Saturated Fat: 5g
- Carbohydrates: 24g
- Sugar: 17g
- Protein: 2g
Your One-Bowl Questions, Answered
I get a few common questions every time I share a recipe like this. Here are the quick answers to save you some time.
Can I make the dough ahead of time?
Absolutely! You can cover the bowl with plastic wrap and refrigerate the dough for up to 48 hours before baking. Let it sit at room temperature for 15 minutes before scooping. You can also freeze scooped dough balls on a tray, then bag them for baking straight from the freezer (add 1-2 minutes to the bake time).
My butter wasn’t fully softened. What now?
It happens! If your butter is still a bit cold, cut it into small chunks before adding it to the bowl with the sugars. Mixing will take a little more muscle, but it will work. For a quick fix, gently microwave the whole stick for 5-7 seconds on each side.
Can I use different mix-ins?
Of course! That’s the fun part. Swap the M&M’s for chopped nuts, peanut butter chips, or even dried cranberries. Just keep the total volume of add-ins around 3 cups so your dough can hold everything together. For a fruity twist, you might love the bright flavors in these Zesty Lemon Raspberry Cookies.
And there you have it. A dessert that delivers on every front: incredible taste, a fun look, and a kitchen that’s still clean enough to impress.
This recipe proves you don’t need a pile of dishes to make something special. It’s the kind of easy, joyful baking that makes everyone happy—especially the person doing the washing up.
I hope this becomes your new favorite quick dessert fix. Enjoy all that flavor (and your clean kitchen!). Let me know how it went by leaving a comment and rating below!