Ever have one of those afternoons where the kids are hangry, you’re running on three hours of sleep, and the thought of cooking a full meal makes you want to hide in the pantry? I’ve been there more times than I’d like to admit. One particularly chaotic Tuesday, I was staring into the abyss of my fridge, desperately trying to assemble something edible from leftover bread ends and a block of cheese. That’s when I accidentally created what my family now calls our ultimate lifesaver: Grilled Cheese Roll-Ups: Gooey Comfort On the Go! They’re the perfect marriage of crispy, buttery exterior and that irresistible, stretchy cheese pull we all dream about.

What I love about this recipe is how it transforms simple ingredients into pure magic. It’s become my go-to for everything from last-minute party snacks to easy toddler meals that even the pickiest eaters can’t resist. The best part? You probably have everything you need already sitting in your kitchen. No fancy equipment or obscure spices required—just good, honest comfort food that comes together in minutes.
Over time, I’ve perfected my method through plenty of trial and error (including a few burnt fingers from impatient taste-testing). I’ll walk you through every step, sharing all the little tricks I’ve picked up along the way. Whether you’re packing kids lunch box meals or need quick recipes snacks for game day, this versatile dish has you covered. The beauty is in its simplicity—sometimes the most memorable food dishes come from the most humble beginnings, much like our ultimate creamy potato soup for cozy nights.
Recipe Overview
Cuisine: American
Category: Appetizer, Snack, Light Meal
Prep Time: 10 minutes
Cook Time: 8-10 minutes
Total Time: 20 minutes
Servings: 4-6 people
What You’ll Need
When I first started making these, I learned that not all rolling pins are created equal. My grandmother’s heavy marble one works beautifully, but I’ve also used a wine bottle in a pinch—just make sure to wipe it down first! For the skillet, I prefer my well-seasoned cast iron because it gives that perfect golden crust, but any non-stick pan will do the trick. A good silicone brush for butter application makes all the difference in achieving that evenly browned finish without soggy spots.
You’ll need basic kitchen tools: a rolling pin for flattening the bread, a sharp knife for trimming, a skillet for cooking, and a baking sheet if you’re making a larger batch. Having everything within arm’s reach makes the process flow smoothly, especially when you’re multitasking with little ones underfoot.
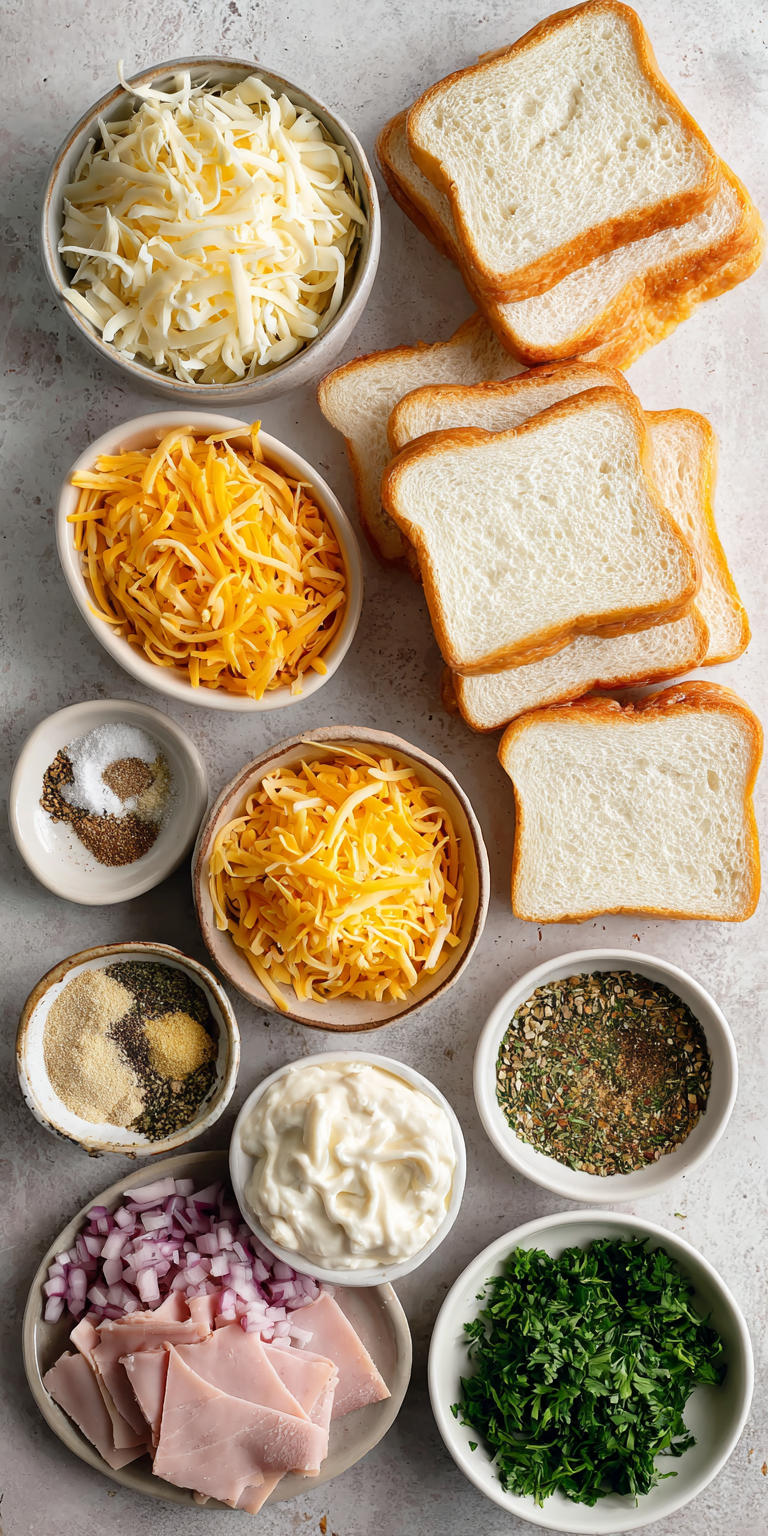
INGREDIENTS
I’ll never forget the time I ran out of cheddar and had to use pepper jack instead—my toddler declared it “too spicy” with the most dramatic frown I’ve ever seen. Now I always keep extra cheese on hand. The key is using cheeses that melt well but still have flavor. I’ve found that a combination of mozzarella for stretchiness and cheddar for sharpness creates the perfect balance. Freshly grated cheese works much better than pre-shredded, which contains anti-caking agents that can affect melting.
Grilled Cheese Roll-Ups: Gooey Comfort On the Go! Recipe
INGREDIENTS
PREPARATION
Notes
Enjoy your homemade Grilled Cheese Roll-Ups: Gooey Comfort On the Go! Recipe!
- 8 slices soft white bread, crusts removed
- 1 cup shredded mozzarella cheese
- 1/2 cup shredded sharp cheddar cheese
- 3 tablespoons softened butter
- 1/4 teaspoon garlic powder (optional)
- 1/4 teaspoon Italian seasoning (optional)
- Marinara sauce for dipping
PREPARATION
Here’s the thing—the rolling technique takes a little practice, but don’t get discouraged if your first few look a bit wonky. Mine certainly did! The secret is applying even pressure and not overfilling with cheese. I’ve found that warming the bread slightly in the microwave for 5-10 seconds makes it more pliable and less likely to tear. Keep a damp cloth nearby to wipe your hands between roll-ups—sticky fingers make the process much trickier. If you’re looking for another simple yet impressive dish, you’ll love our herb garlic butter chicken breasts weeknight favorite.
- Using a rolling pin, flatten each bread slice until about 1/4-inch thick. This helps them roll neatly without cracking.
- In a medium bowl, combine both cheeses. Sprinkle about 2 tablespoons of the mixture evenly over each flattened bread slice, leaving a small border around the edges.
- Starting from one end, tightly roll each slice like a jelly roll. Press gently to seal the edge—the natural moisture in the bread should help it stick together.
- In a small bowl, mix softened butter with garlic powder and Italian seasoning if using. Brush this mixture generously over the outside of each roll-up.
- Heat a skillet over medium heat. Cook roll-ups in batches, seam-side down first, for 2-3 minutes per side until golden brown and crispy.
- Transfer to a cutting board and let rest for 1-2 minutes before slicing—this allows the cheese to set slightly so it doesn’t ooze out everywhere.
- Slice each roll-up into 1-inch pieces and serve immediately with warm marinara sauce for dipping.
NUTRITION INFORMATION
- Calories: 185 per serving
- Carbohydrates: 15g
- Protein: 8g
- Fat: 10g
- Saturated Fat: 6g
- Cholesterol: 25mg
- Sodium: 280mg
Creative Variations to Try
Once you’ve mastered the basic version, the customization possibilities are endless. For pizza roll ups, I like to add a thin layer of pepperoni and a sprinkle of oregano before rolling—my kids go crazy for these. Another favorite in our house is the “everything bagel” version where I mix everything bagel seasoning into the butter brush. For picky toddler meals, sometimes I’ll sneak in finely chopped spinach between the cheese layers—they never notice the green flecks when it’s all melted together.
If you’re making these for football food gatherings, consider setting up a “build your own” station with small bowls of different fillings. Cooked bacon bits, diced ham, jalapeños for the adults—everyone can create their perfect combination. The same concept works beautifully for movie night dinner when you want something more interactive than plain popcorn. For another elegant yet easy option, try our puff pastry croque madame.
Storage and Reheating Tips
These are definitely best enjoyed fresh, but if you do have leftovers (rare in my experience), they reheat surprisingly well. Arrange them in a single layer on a baking sheet and pop them in a 350°F oven for 5-7 minutes until crispy again. The microwave will make them soft, so I don’t recommend it unless you’re desperate. For make-ahead convenience, you can assemble the roll-ups up to a day in advance, cover tightly with plastic wrap, and refrigerate until ready to cook.
When packing these for daycare meals or kids lunch box meals, let them cool completely first to prevent condensation from making them soggy. I include the marinara sauce in a separate small container for dipping. They taste great at room temperature, but if you have access to a toaster oven, a quick warm-up makes them taste freshly made.
FREQUENTLY ASKED QUESTIONS
Can I make these with whole wheat bread?
Absolutely! Whole wheat works well, though it may be slightly less pliable than white bread. I recommend warming it for a few extra seconds to make rolling easier. The nutty flavor actually pairs beautifully with the cheese.
What other dips work besides marinara?
We’ve experimented with plenty of options. Ranch dressing is always a hit, but tomato soup makes it feel extra cozy. For something different, try a spicy mayo or even a cheese sauce for maximum cheesiness.
Can I freeze these before cooking?
Yes! Arrange the assembled, uncooked roll-ups on a parchment-lined baking sheet and freeze until solid, then transfer to a freezer bag. Cook from frozen, adding an extra 2-3 minutes per side. Perfect for having homemade snacks ready anytime.

Conclusion
At the end of a long day, there’s something incredibly satisfying about serving up these Grilled Cheese Roll-Ups: Gooey Comfort On the Go! They’ve saved countless dinners in my household and become one of those best appetizer recipes I turn to again and again. Whether you’re feeding hungry toddlers or need quick party snacks for unexpected guests, this dish delivers every time. I’d love to hear how your version turns out—tag me on social media if you give them a try!